WSL2嵌套虚拟化
VMware里面运行ubuntu虚拟机感觉用的有点难受,还是WSL用的舒服,但是WSL不能嵌套虚拟化用不了qemu和kvm,之前看到一篇博客重新编译内核,现在试一下能不能启用开启嵌套虚拟化
参考博客:在 WSL2 上获得近乎完整的 Linux 体验 - Pan Xiao’s Blog (ddupan.top)
安装基本工具
- 使用如下命令安装
1 | sudo apt update && sudo apt -y upgrade |
- 在这里出现一个报错,请看问题一
编译内核
- 先查看正在使用的wsl2是的内核版本是哪个版本
- 使用
win + R,然后输入wsl,进入wsl后输入uname -r,就会出现相应的内核版本,比如我的版本就是5.15.146.1的内核版本,即5.15版本

- 然后使用git命令拉取微软官方修改的wsl2内核的仓库这里建议直接去官网下载压缩包,github拉取太大的文件老是会出现一些状况
1 | git clone https://github.com/microsoft/WSL2-Linux-Kernel.git |
- 由于拉取的仓库太大,所以我选择拉取相应内核的分支,可以省下不少时间和存储空间,拉取时间较长,干点别的事情,拉取的时候还出现了一个问题,详细请看问题2
1 | git clone --branch linux-msft-wsl-5.15.y --single-branch https://github.com/microsoft/WSL2-Linux-Kernel.git |
- 进入相应版本的内核,我这边是下载zip压缩包后解压,这边直接cd进入即可
1 | cd WSL2-Linux-Kernel-linux-msft-wsl-5.15.y/ |
- 然后使用如下命令将当前内核配置复制一份到所在目录文件下
1 | zcat /proc/config.gz > .config |
- 使用
make menuconfig,查看和修改.config文件中的配置选项。这边使用该命令出现一个问题,详细请看问题3 - 进入如下界面,选择
Virtualization回车键进去
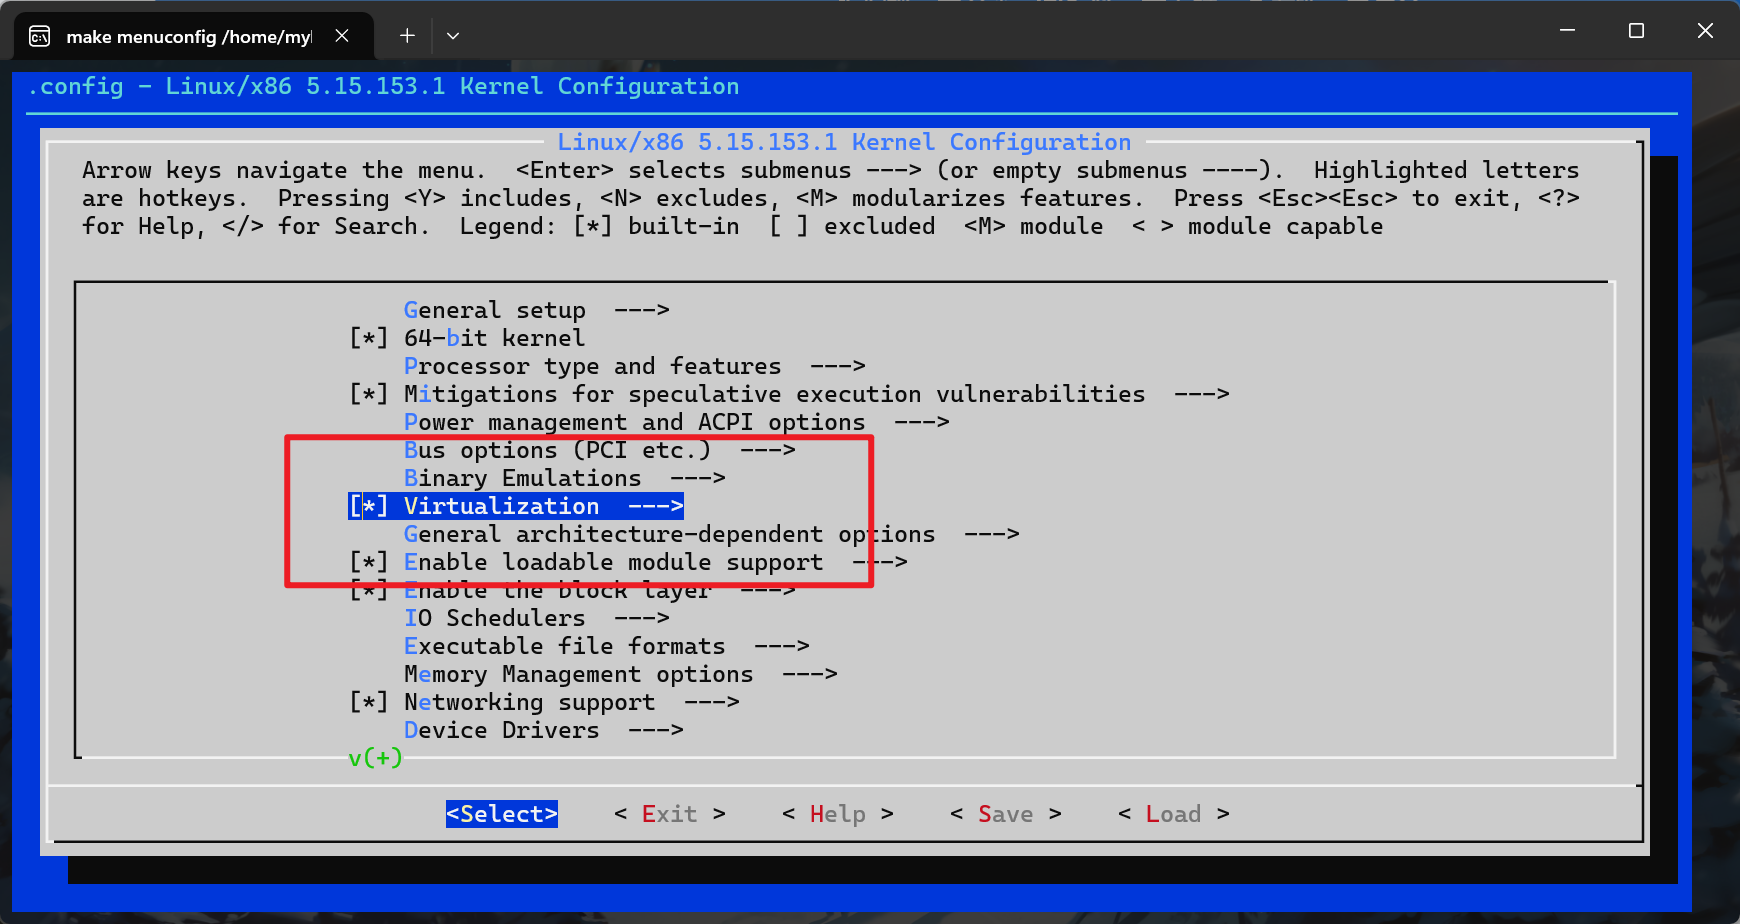
- 进入后按照如下设置
virtio-net也被选中 ( 如果有 )- 可以编译成模块再加载,但我选择直接编译进内核,同时可以编译 Multipath 依赖的支持,以便后续 systemd 可以少一个报错
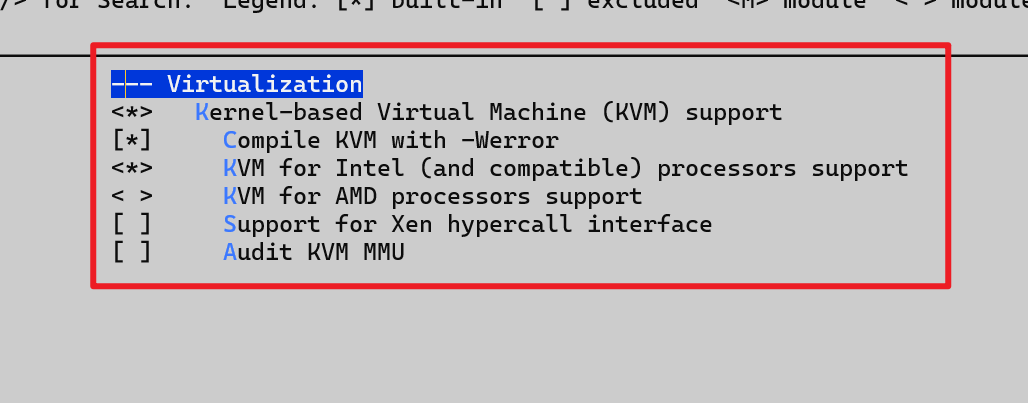
- 按两次 ESC,再导航至
Processor type and features -> Linux guest support,确定KVM Guest support已被选中
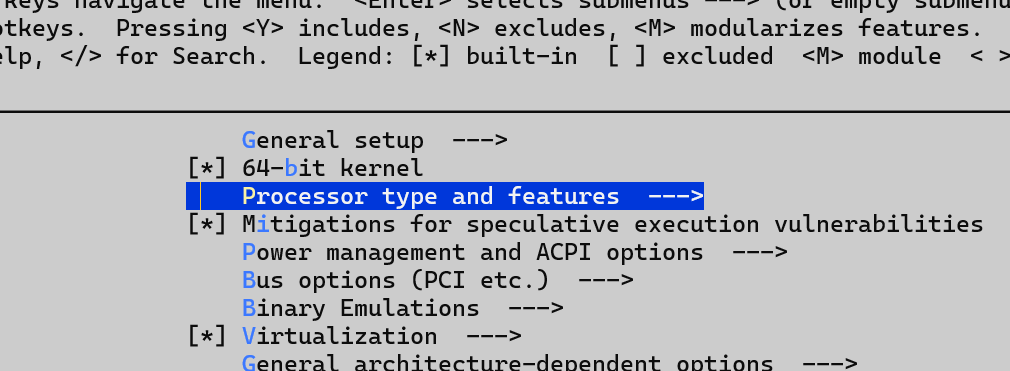

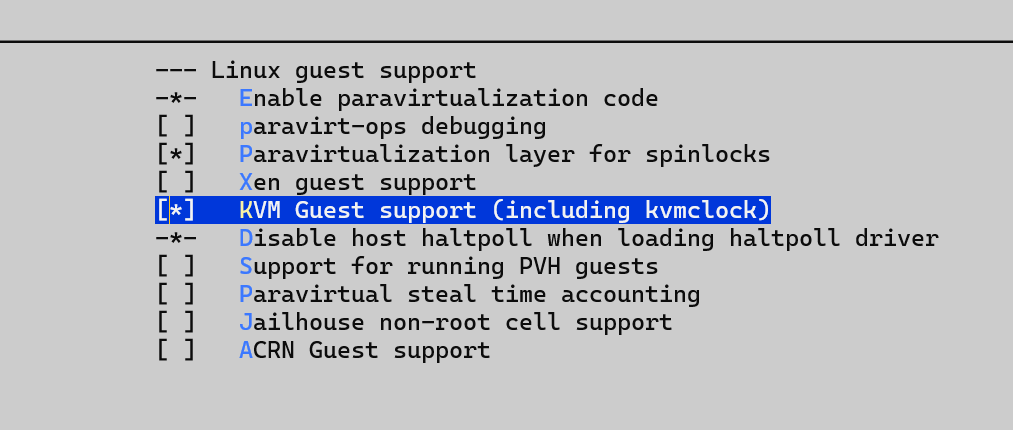
- 之后保存并退出

- 开始编译
1 | make -j 8 |
- 编译时出现脚本没有执行权限,直接一键给执行权限,然后再编译
1 | chmod +x scripts/*.sh |
编译要一步一步找错误了,编译时出错找错就不详细说明了,编译需要点时间,直接干别的事情
出现这个就算是编译好了

- 在d盘新建文件夹
bzImage - 然后使用wsl2下的命令行输入,复制的目标路径为Windows文件目录,注意:内核不要保存在有中文路径的目录、
- 由于我c盘的用户名是中文,所以后来我放在了D盘
1 | cp arch/x86/boot/bzImage /mnt/d/bzImage |
- 然后修改配置,配置文件在C盘这个目录下,配置才会起作用
1 | vim /mnt/c/Users/<username>/.wslconfig |
- 然后写入
1 | [wsl2] |
- 然后重启wsl2,打开Powershell,输入命令
1 | wsl --shutdown Ubuntu |
然后再打开新的wsl窗口即可
验证:打开wsl后输入,这个时间会出现你编译内核的时间
1 | uname -ar |

- 验证支不支持虚拟化
kvm-ok

添加调试内核的功能
- 先把内核调试的环境搭建好,之后肯定会到内核的。就直接用我们前面下载好的内核,还需要对内核进行重新编译(在编译的时候不要忘记把之前的虚拟化选项选上。)
- 编译完内核之后,那个文件夹就不能再编译了,这时我们要重新解压缩我们之前下载好的对应
WSL2内核源码文件。 - 然后使用
cd进入这个文件夹,使用make menuconfig这个命令。先将我们的虚拟化选项勾起来。然后我们使用这个图形化界面的搜索功能,按下?/键进行搜索

- 搜索内容为
config_gdb_script,然后按ENTER键进行搜索,这时我们就会来到这个界面
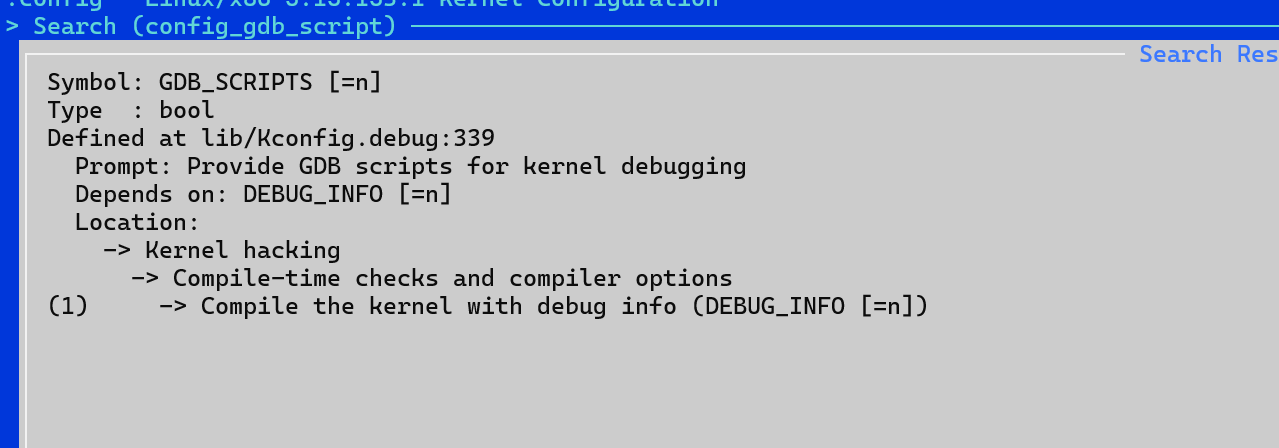
- 接下来我们按下
1键来进行选择,就会跳转到这个界面

- 接下来我们选择这个选项
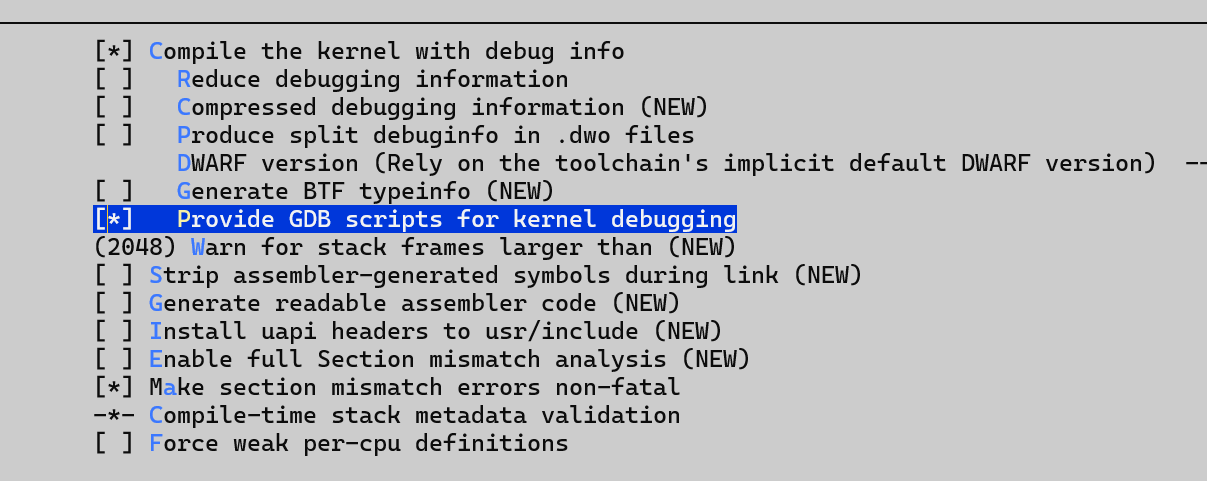
- 然后保存配置的选项

- 然后就可以使用
make -j 8对内核进行编译。等待一段时间就会将内核编译好,已经编译好了

- 复制一份编译好的内核到我们
windos文件夹下,稍后再对我们编译好的内核进行操作

- 现在我们再来编译调试内核的
gdb,我们继续在当前目录下输入make scripts_gdb,这时我们就会生成如下文件

- 然后我们编辑
~/.gdbinit文件,添加配置文件:
1 | add-auto-load-safe-path /home/myheart/WSL2-Linux-Kernel-linux-msft-wsl-5.15.y |
- 然后我们使用
qemu调试我们刚刚编译好的内核文件,这时就会出现如下界面。
1 | qemu-system-x86_64 -kernel arch/x86_64/boot/bzImage -s -S -append nokaslr |
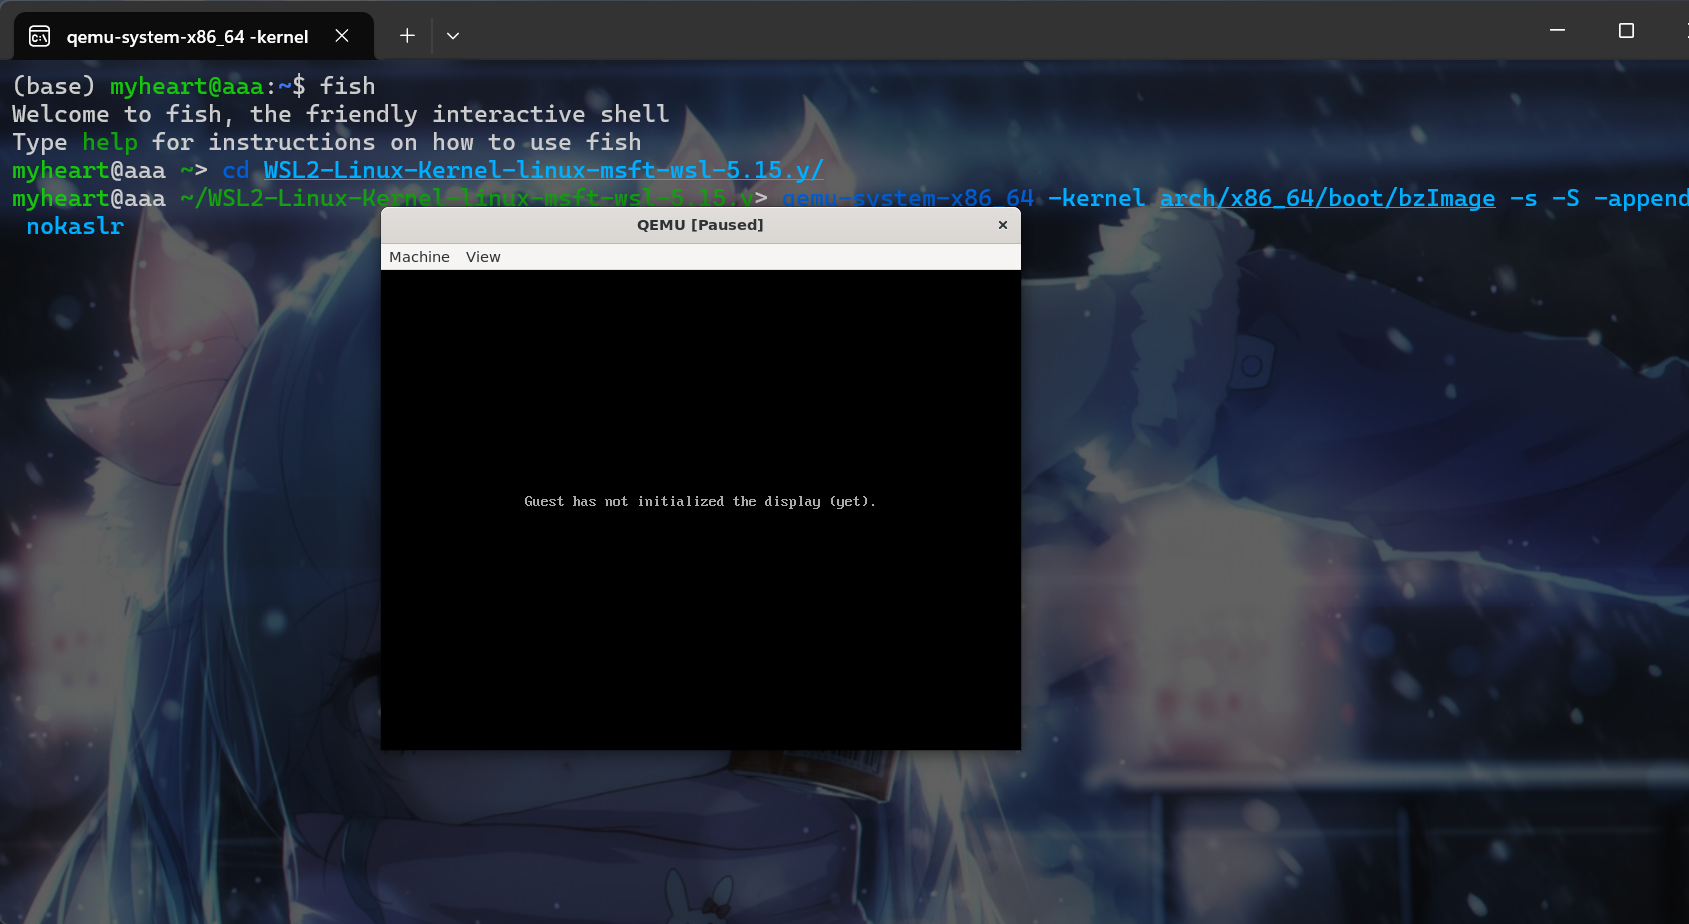
- 这样我们再新建一个终端输入命令
gdb vmlinux

- 输入
target remote :1234命令,这样就可以进行调试了。

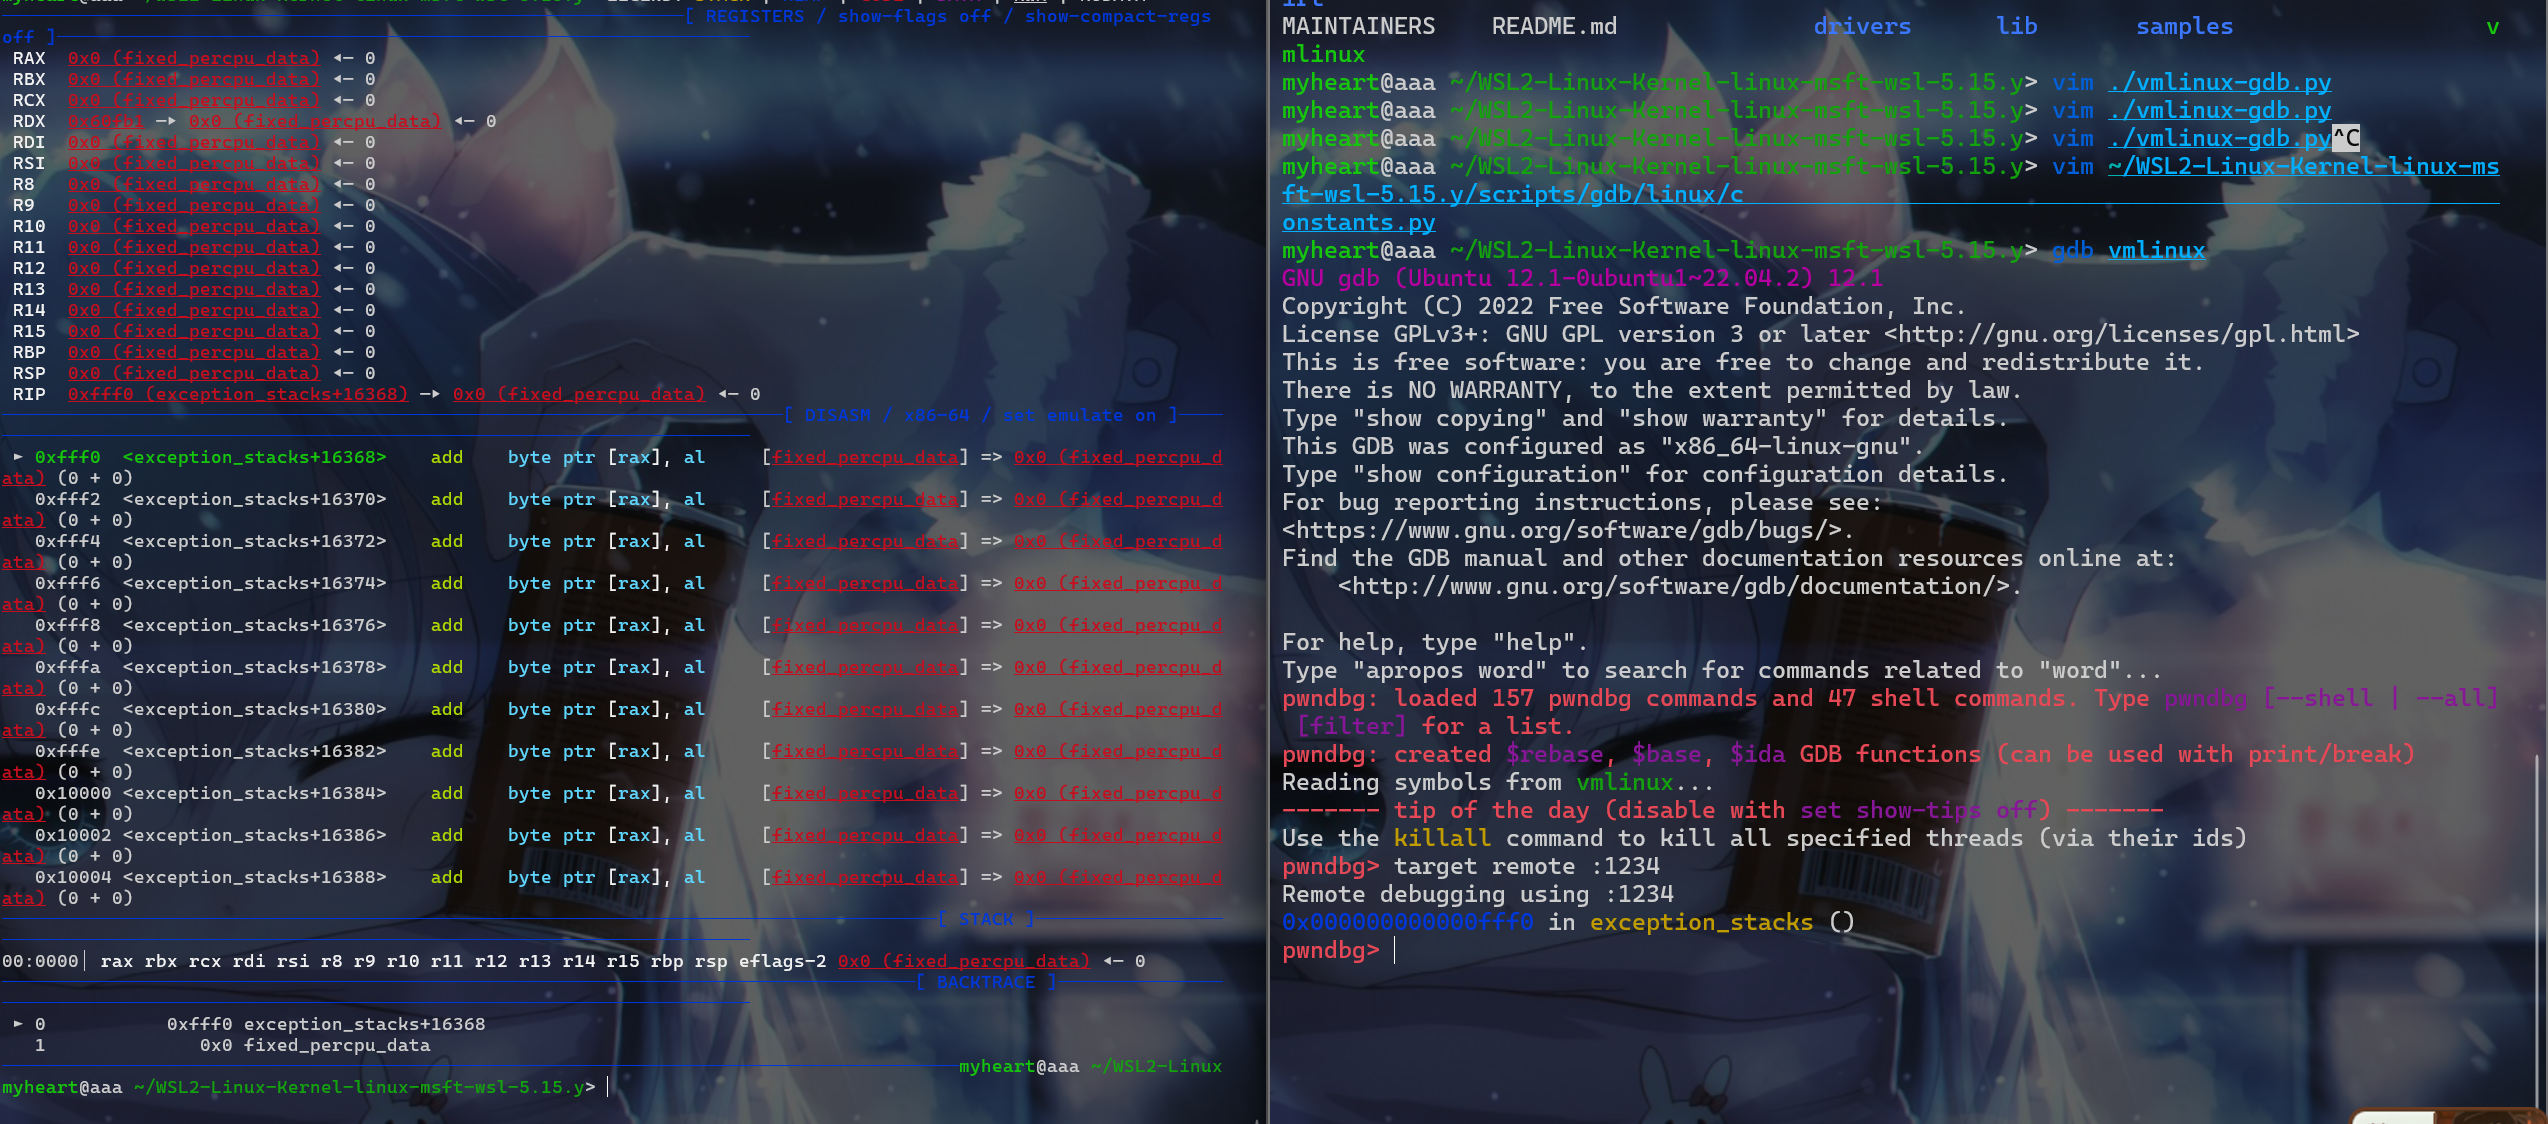
- 我们可以下载硬件断点到
kernel_init中,使用命令hbreak kernel_init,下完内存断点后就使用c命令,就会出现如下图所示。

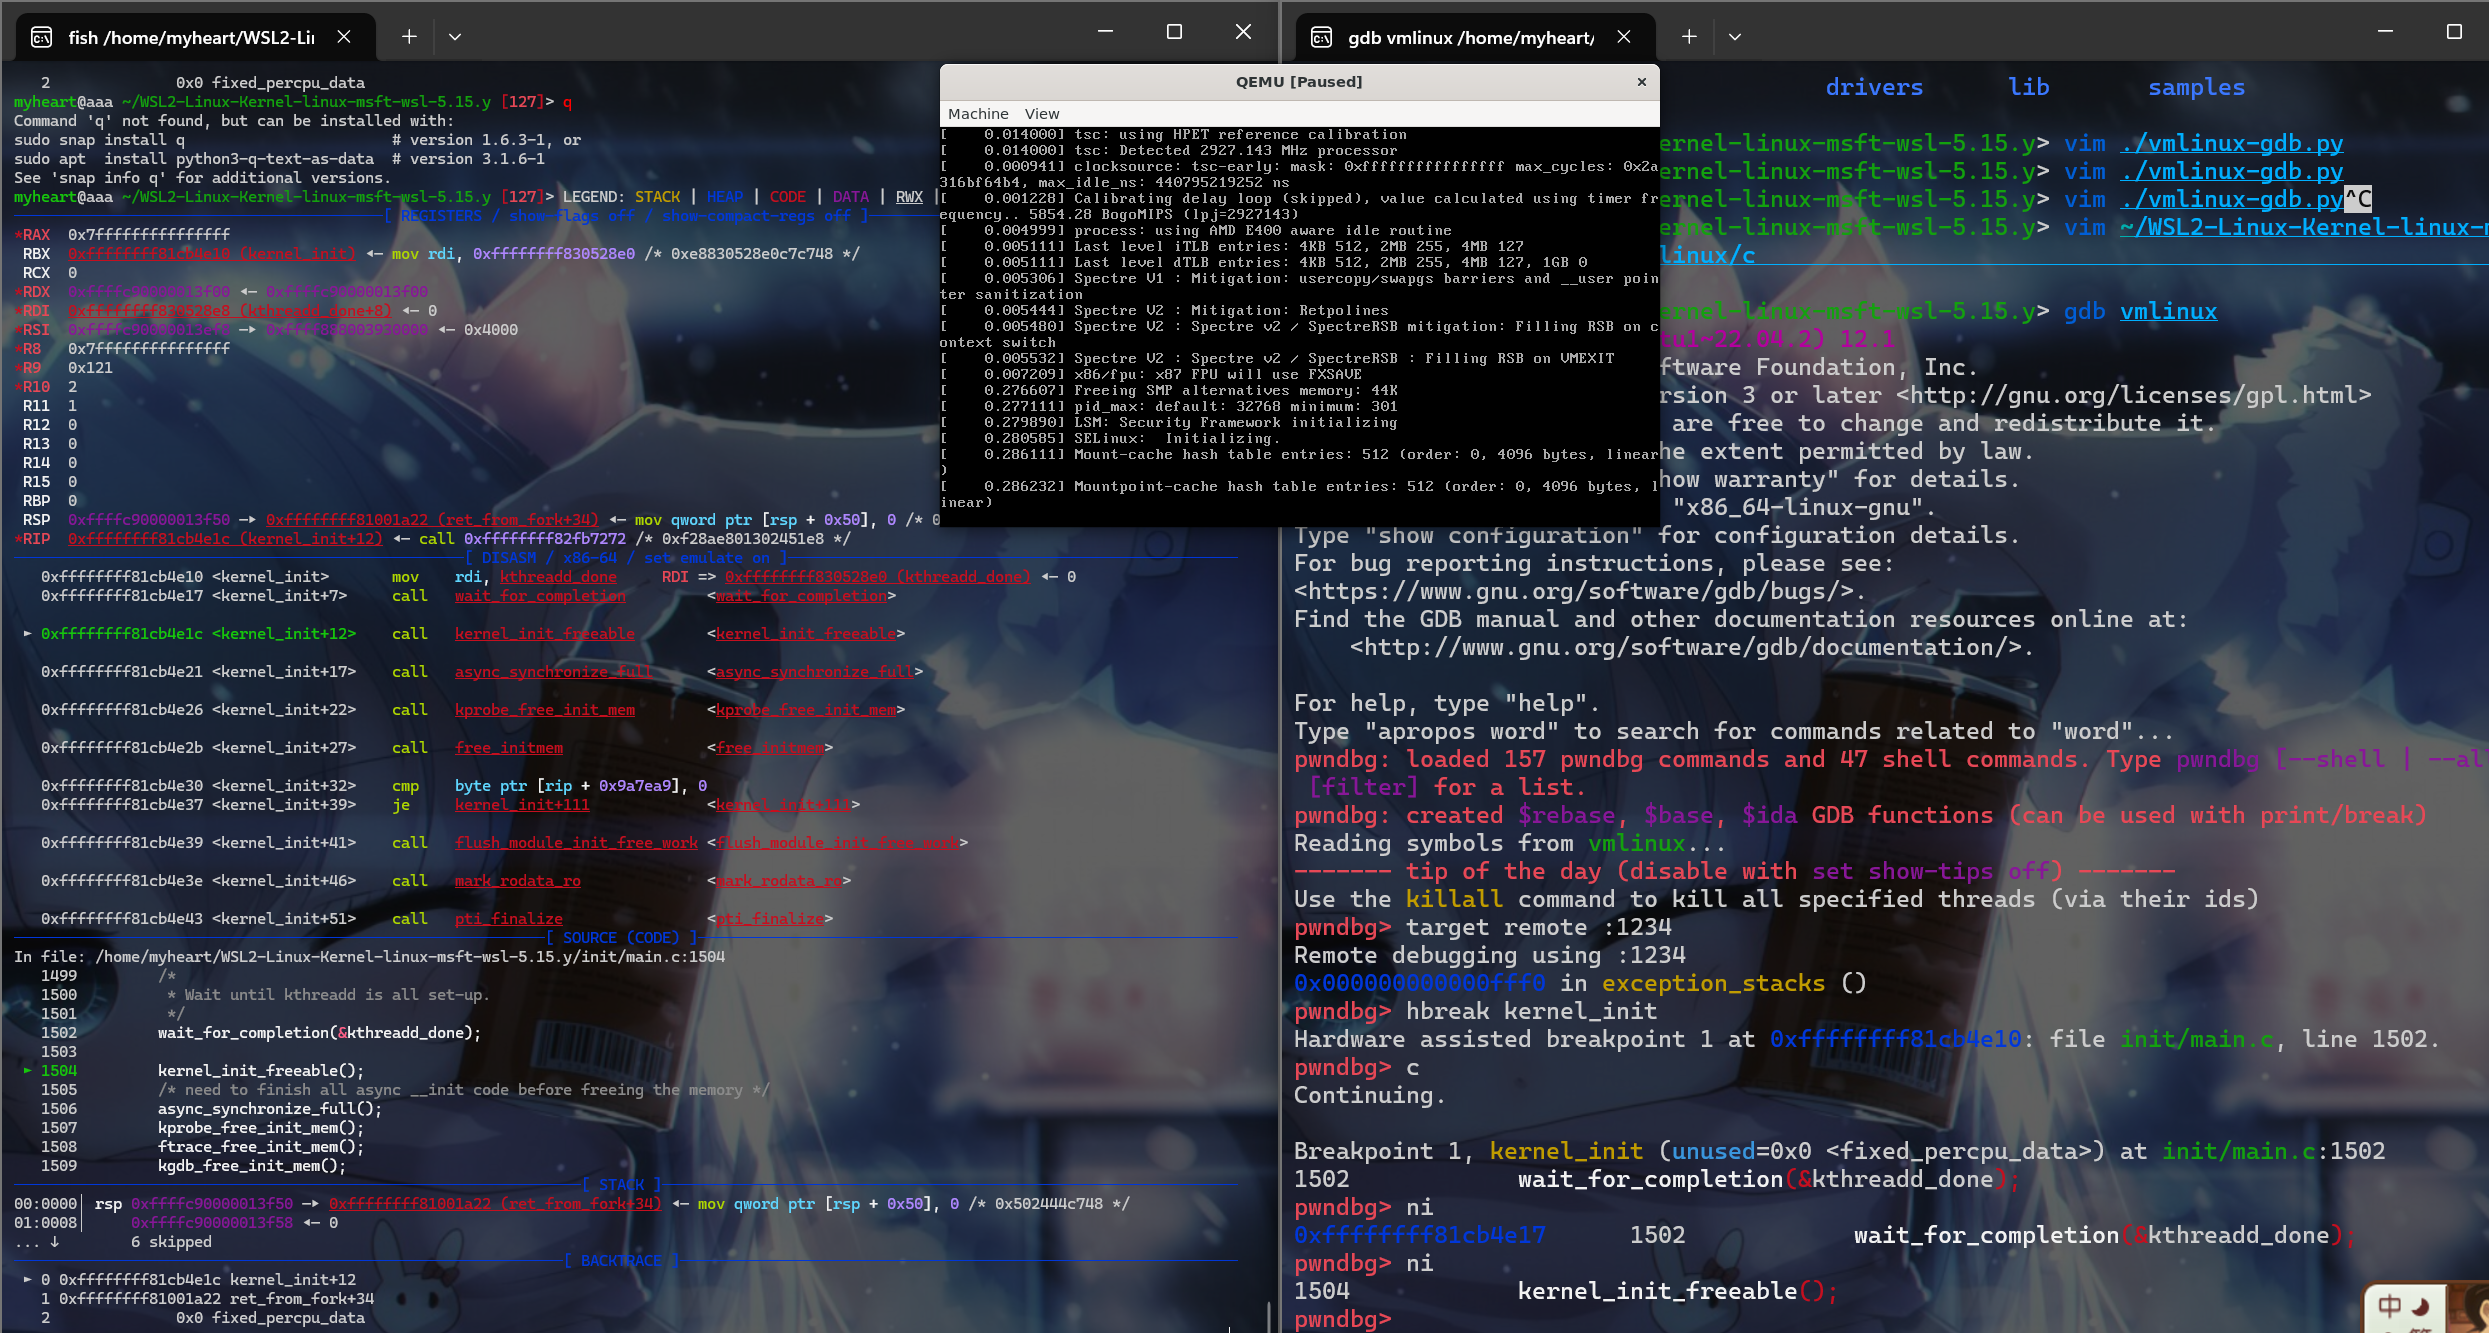
- 我们还可以看到对应的内核代码

问题
问题1
- 安装基本工具的时候出现了如下问题
- 一个是关于
ldconfig.real的警告,另一个是关于libvirt包无法定位的问题。
1 | Reading package lists... Done |
- 解决如下:关于
libvirt包无法定位的问题- 安装以下包来替代
libvirtd
- 安装以下包来替代
1 | sudo apt install libvirt-daemon-system libvirt-clients |
- 这样就可以在wsl上使用qemu了,比在VMware上使用流畅很多,而且打pwn的动调也可以使用wsl了,不用两边切换了
- 用qemu开虚拟机已经非常流畅不会卡了
问题2
- 在拉取仓库的时候遇到如下问题:通常是由于网络问题、服务器响应超时或者存储空间不足等问题导致的。
1 | RPC failed; curl 56 GnuTLS recv error (-54): Error in the pull function 和 fetch-pack: unexpected disconnect while reading sideband packet |
- 增加缓存容量
1 | git config --global http.postBuffer 3000000000 |
- 最后还是出错,直接上github官网上下载对应内核版本的zip压缩包
问题3
- 使用
make menuconfig命令出现报错。
1 | * |
- 问题是缺少
ncurses包,使用如下命令解决
1 | sudo apt update |
- 安装完包后再运行,仍出现错误
1 | UPD scripts/kconfig/mconf-cfg |
- 问题是:
flex工具没有安装,使用如下命令安装
1 | sudo apt update |
- 再次运行还是错误
bison工具没有安装
1 | sudo apt update |
- 仍然出现报错
1 | YACC scripts/kconfig/parser.tab.[ch] |
./scripts/cc-version.sh: Permission denied表示./scripts/cc-version.sh脚本没有执行权限。修改权限即可
1 | chmod +x ./scripts/cc-version.sh |
Sorry, this compiler is not supported:这个错误表示当前的编译器版本不被支持。对于内核编译,推荐使用较新的 GCC 版本,通常是 GCC 7 或更高版本。你可以通过以下命令安装
1 | sudo apt update |
- 确认你的系统上安装了适合的汇编器版本。对于内核编译,推荐使用较新的汇编器版本。通常,
binutils包含了所需的汇编器工具。你可以通过以下命令安装或更新binutils:
1 | sudo apt update |
- 问题解决:
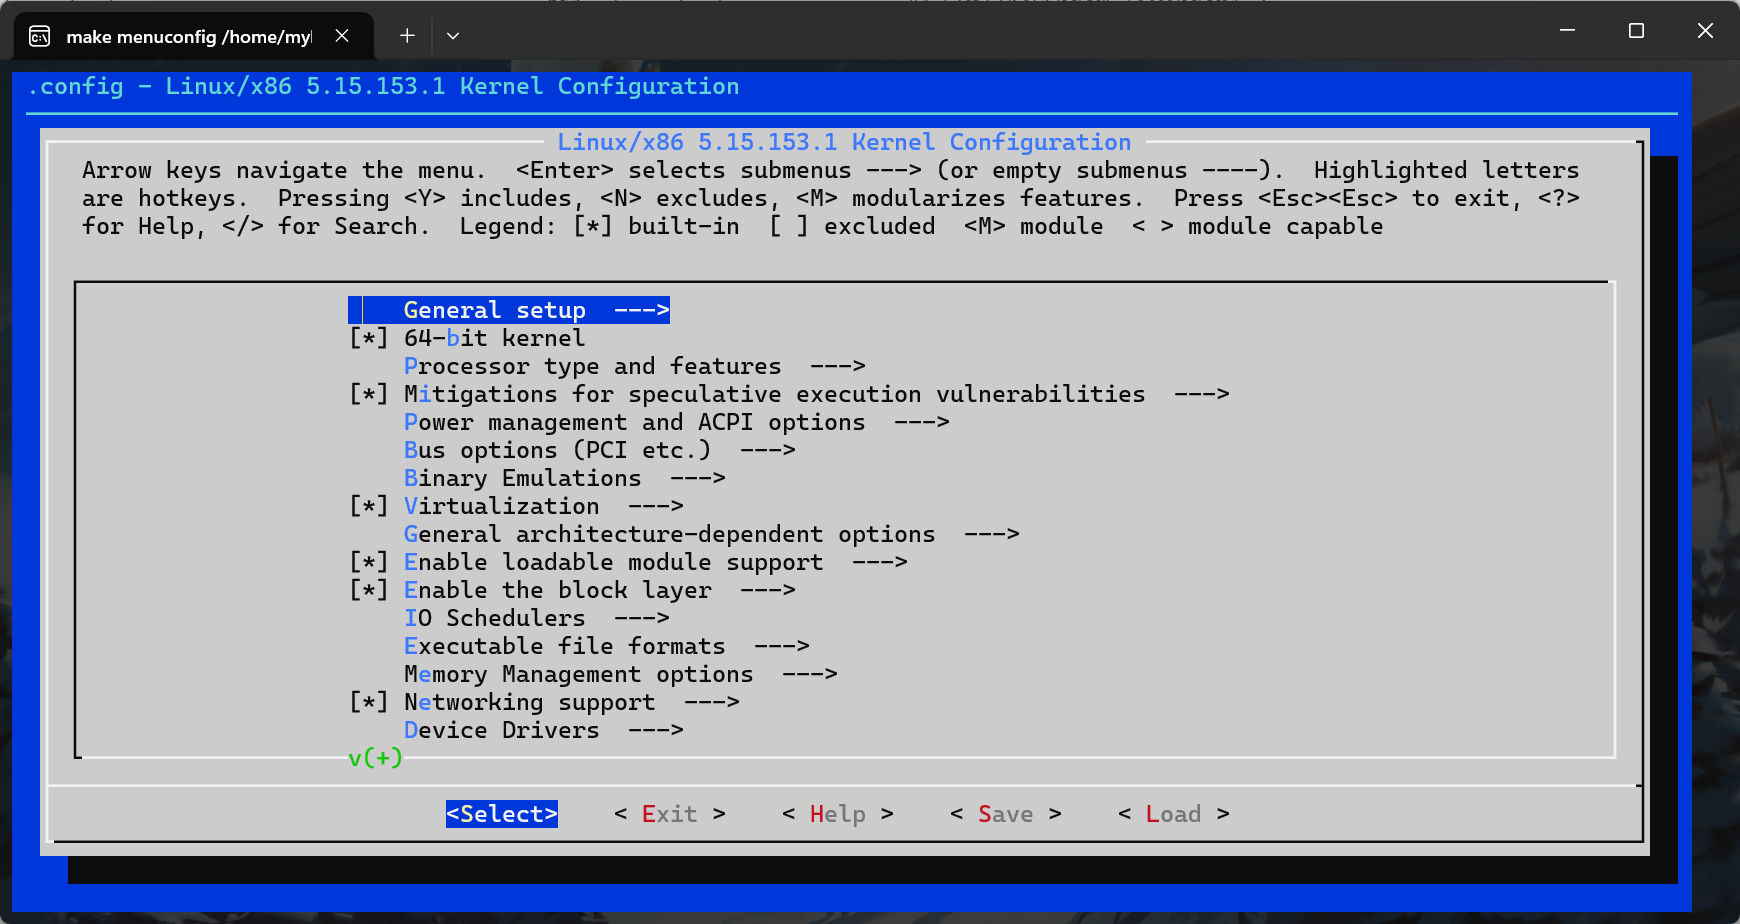
内核编译选项翻译与解释
- 由于内核编译选项太多,并且都是中文,我并不太理解,并且学不进去东西,就来翻译看看内核这些选项,我让我了解一下内核具有的一些功能。
- 先是调用
make menuconfig的一开始的界面。
菜单
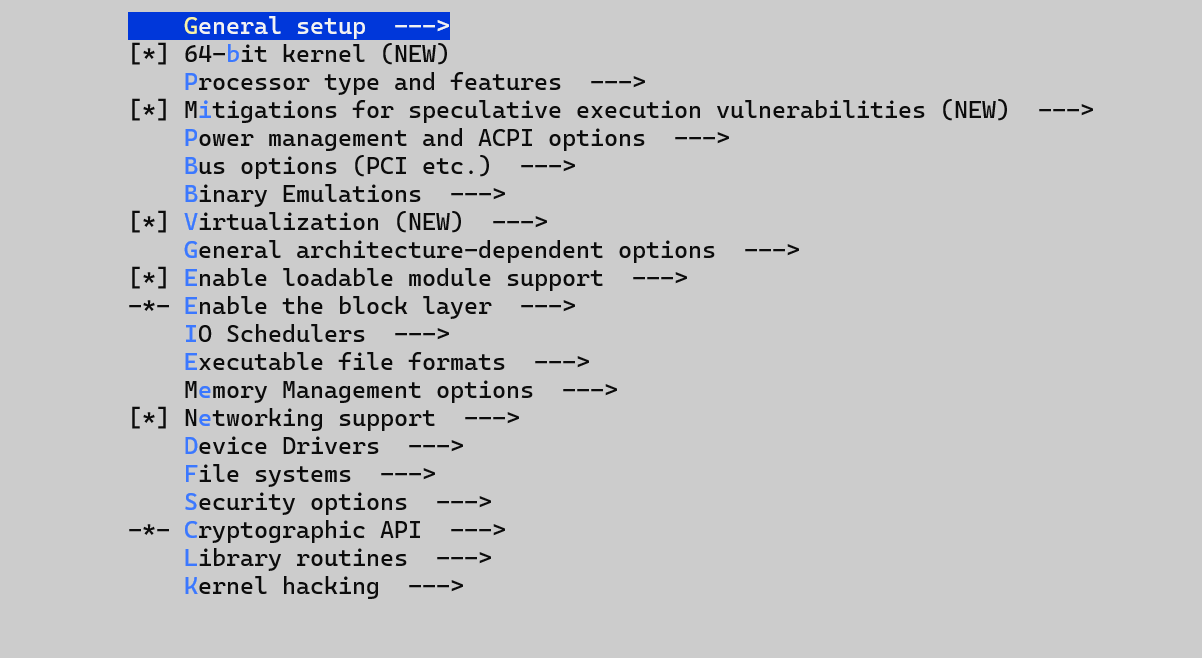
1 | (通用设置)General setup ---> |
General setup
- 先来看看通用设置的具体选项。
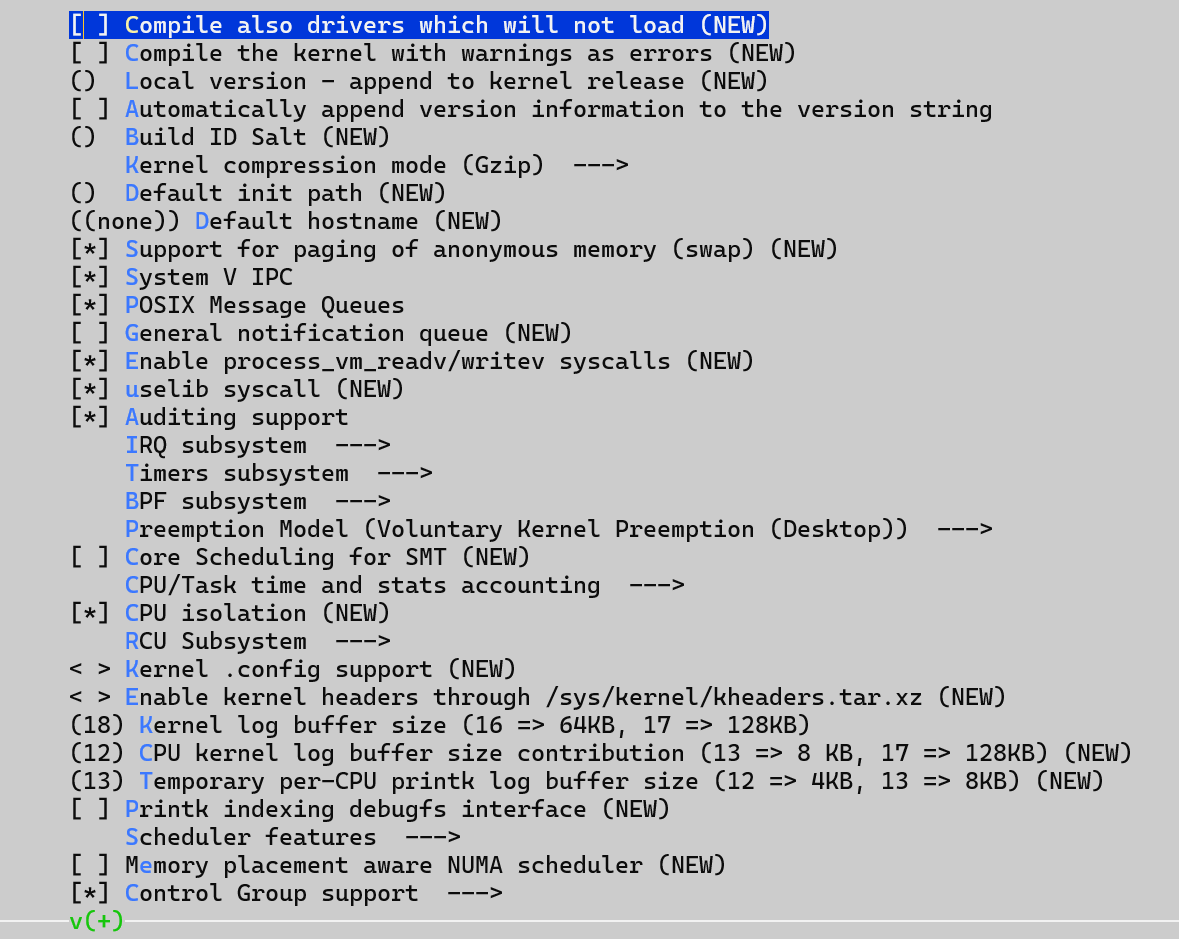
1 | (编译不加载的驱动)[ ] Compile also drivers which will not load (NEW) |
本博客所有文章除特别声明外,均采用 CC BY-NC-SA 4.0 许可协议。转载请注明来自 iyheart的博客!

