
PWN堆double_free
前提介绍
- double_free漏洞,顾名思义就是是否两次相同的堆块。
- 其实打堆首先要理解堆,理解堆的最好方式就是自己亲自去动手实验,动调。实验代码可以自己写,也可以自己找还可以使用ai跑出来。最困难的其实还是环境问题。
漏洞成因
- 漏洞成因本质上还是uaf,当两次释放堆块的时候,
示例程序
实验1
- 在ubuntu16.04的环境中编写如下的c代码
- 使用gcc编译,编译指令
gcc -g -O0 -fno-stack-protector -z execstack -no-pie -o lab_1 lab_1.c - 编译好后使用pwndbg动态调试
1 |
|
分析1
- 先使用
ni指令,将该程序运行到两次malloc之后,第一次free之前
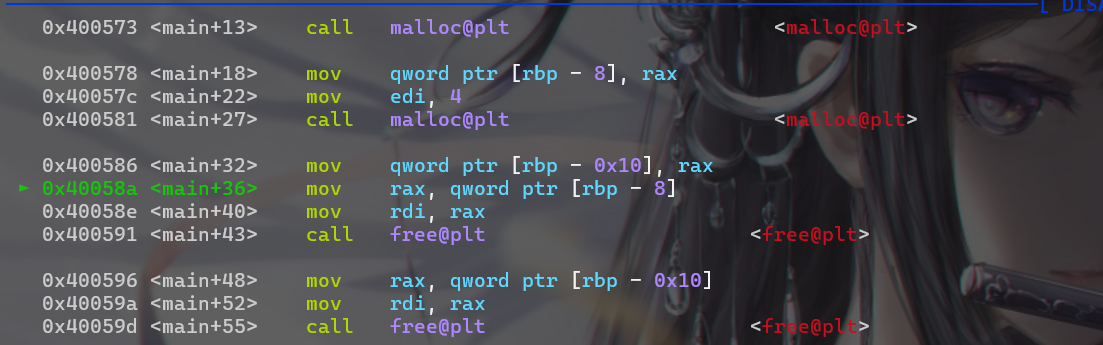
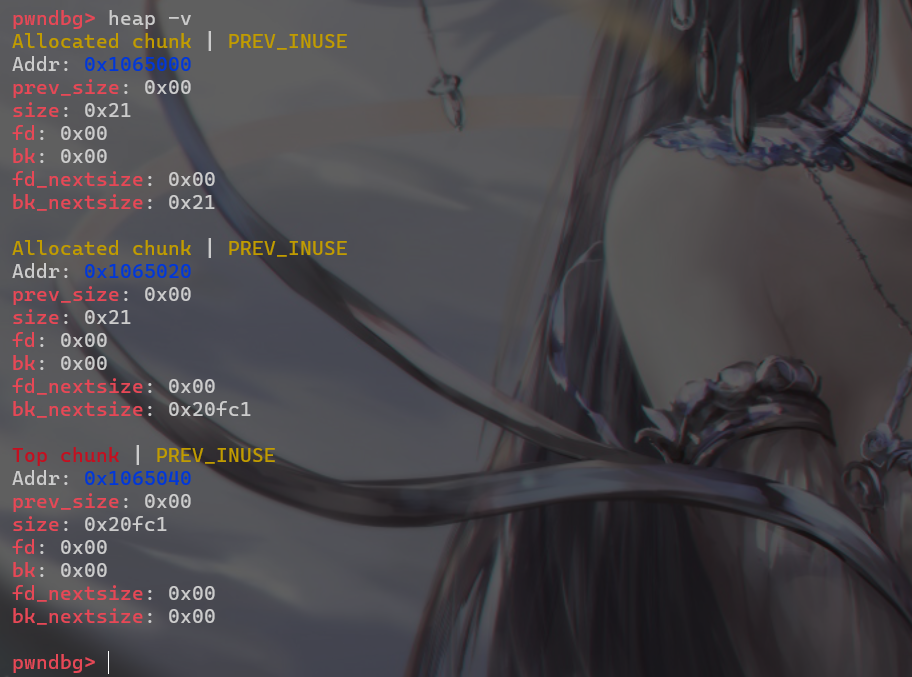
- 然后使用
heap -v命令,可以看到申请了两个0x21的堆块
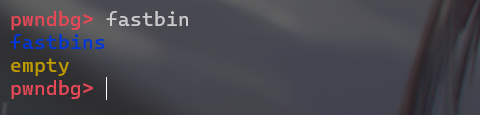
- 使用
fastbin命令查看fastbin,发现目前还没有free堆块,fastbin数组是空的
- 现在使用
ni命令,将程序运行到两次free之后,第三次free之前
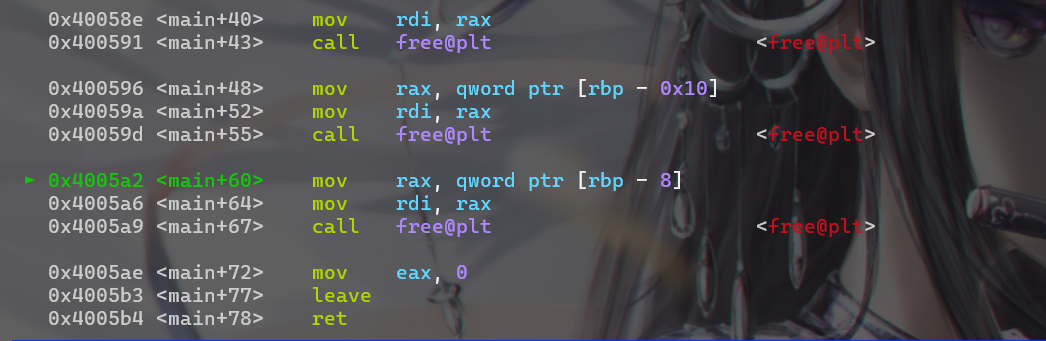
- 再使用
heap -v查看堆块:这里发现两个堆块都被释放了,都空闲着,而且此时第二个chunk的fd指针指向了第一个chunk。
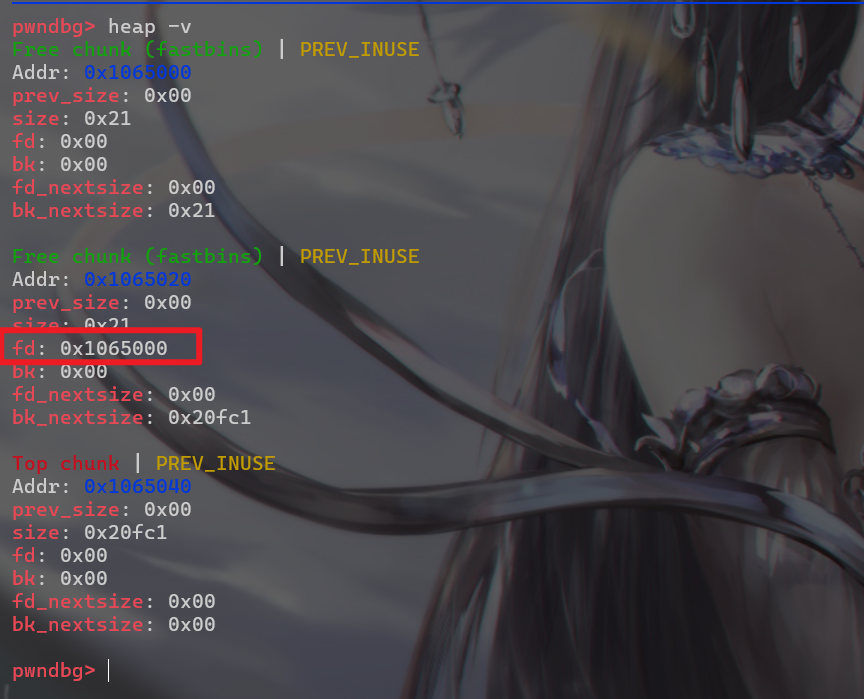
- 再使用fastbin命令查看fastbin:这时显示fastbin管理着两个大小为0x20的俩个空闲堆块

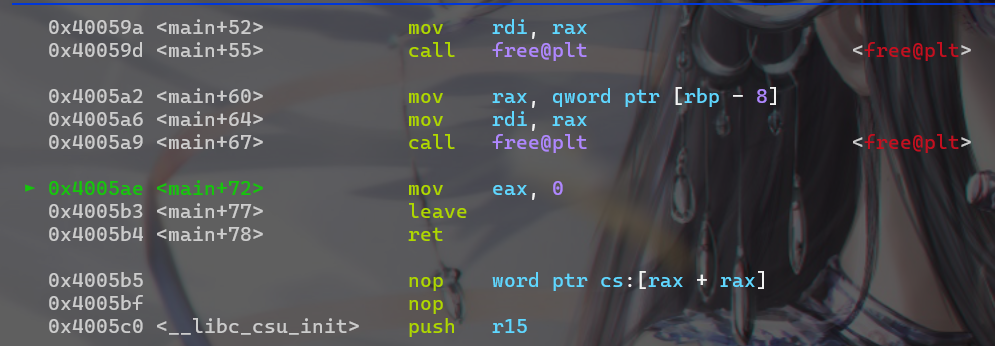
- 接下来使用
ni命令将程序运行到第三次free之后
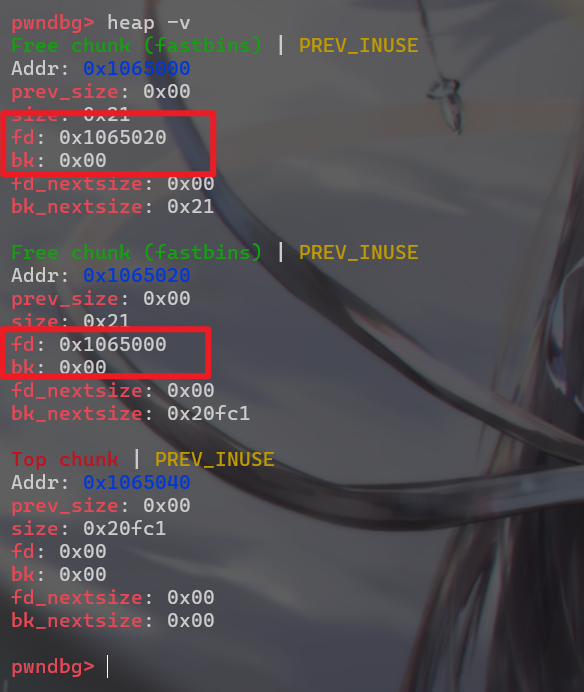
- 这时使用
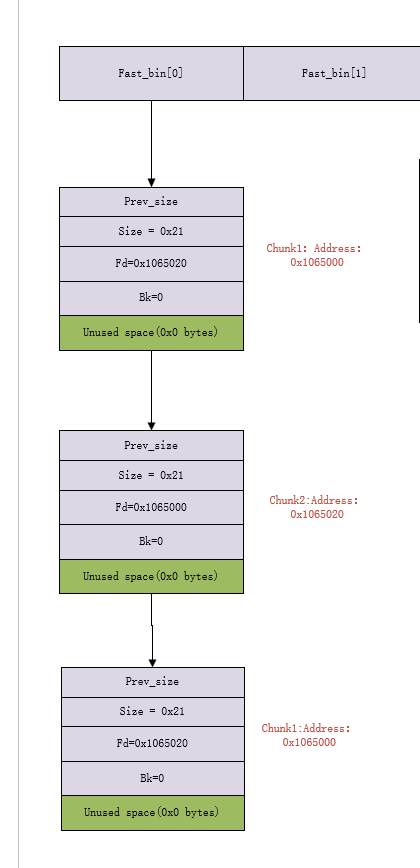
heap -v命令查看chunk,发现第一个堆块的fd指针指向了第二个堆块,而第二个堆块的fd指针又指向了第一个堆块
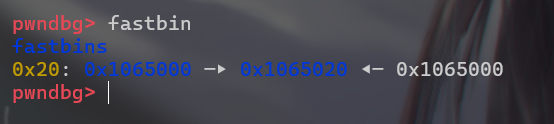
fastbin命令再查看fastbin:发现fastbin数组管理0x20空闲堆块链表指向顺序如下:堆块1->堆块2->堆块1
分析2
- 查看使用
x/20gx 0x1065000查看内存
1 | pwndbg> x/20gx 0x1065000 |
- 这样堆块的具体布局就像下图这样
- 为什么会出现这样的指向,从源码分析,找到glibc2.23的源码,对其源码进行分析
- 这里是free的函数的实现源码。但是fd指针的修改具体不在这个函数里边,我们重点关注第37行
_int_free
- 这里是free的函数的实现源码。但是fd指针的修改具体不在这个函数里边,我们重点关注第37行
1 | void |
-
_int_free函数的源码如下,下面只是这个函数的部分源码,具体的代码去这个网站上看,https://elixir.bootlin.com/glibc -
具体位置在
glibc2.23 - > malloc - > malloc.c -
看源码很牢,但是这是必须经历的,将注意力集中到35行之后的代码
-
p是指向刚刚被释放还没有进入
fastbin的chunk,第36行mchunkptr old = *fb, old2;这行代码表示,将fb是指向fastbin数组中管理的第一个chunk。这段代码就表示,将old指向第一个chunk的位置,然后再定义一个old2变量,但old2没有被赋值 -
然后再注意第47行代码
p->fd = old2 = old;,这行代码就会将刚被释放的堆块插入到fastbin所管理的链表中即 -
然后再注意到第49行代码,除了做一些安全检查之外还会修改fastbin,使其指向
Block p
-
1 | fastbin -> Block A -> Block B -> NULL |
1 | if ((unsigned long)(size) <= (unsigned long)(get_max_fast ()) |
实验2
- 在ubuntu16.04的环境中编写如下的c代码
- 使用gcc编译,编译指令
gcc -g -O0 -fno-stack-protector -z execstack -no-pie -o lab_1 lab_1.c - 编译好后使用pwndbg动态调试,边调试边思考
- malloc将堆重新申请回来的时候,fastbin的链表是如何更新的
- 为什么要修改a1[0]和b[1]
- 程序将会输出什么
1 |
|
- 使用gcc编译后程序运行的结果如下:

分析1
- 之前的过程就不用分析了,直接给出第3次free后的堆块链表
-
直接分析第14行的程序,
a1 = (long long unsigned)malloc(sizeof(int));当使用malloc申请堆块的时候,申请的堆块大小刚好等于前面释放堆块的大小,那么malloc就会从fastbin中找空闲的堆块。由于该链表的进出顺序是后进先出。这就会造成申请到的堆块会是chunk1 -
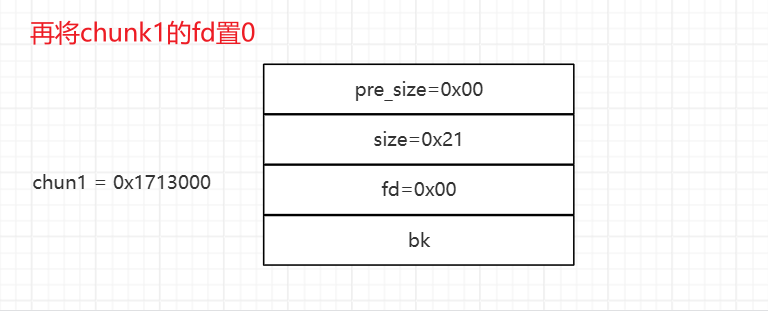
这边先仔细将一下,chunk1脱离fastbin后,fastbin如何更新链表,当执行
a1 = (long long unsigned)malloc(sizeof(int));后(这里由于是第二个实验地址会有所不同)- fastbin指针会先指向chunk2
- 然后会将chunk1的fd指针置为
NULL - 然后malloc会将返回chunk1中用户使用的堆空间地址

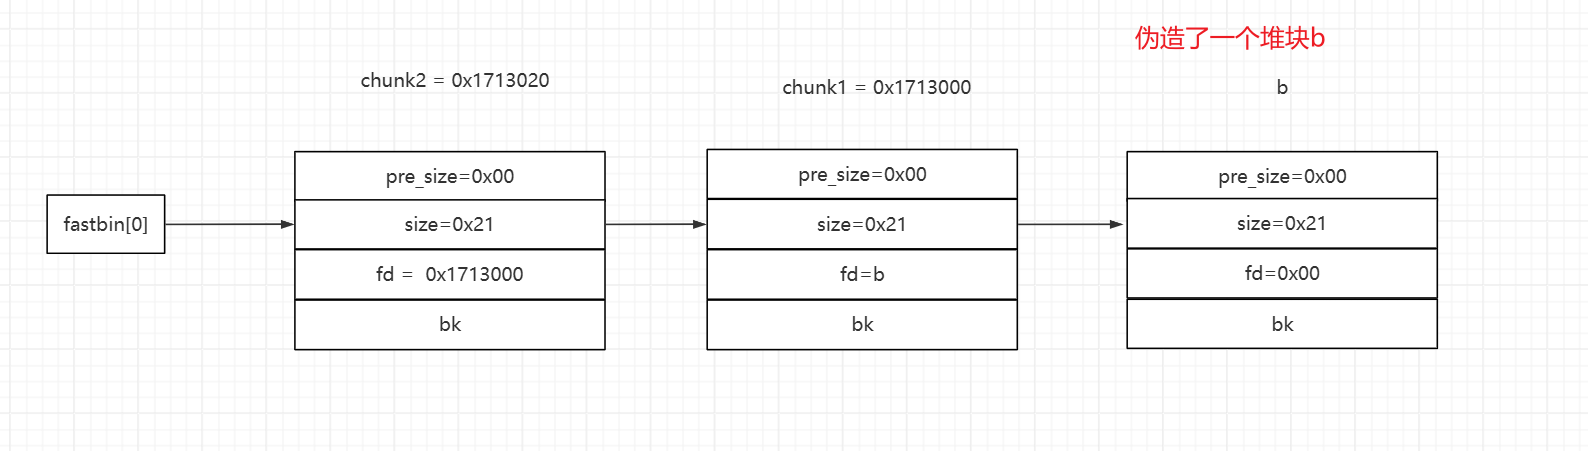
- 当程序执行后,就会伪造一个堆块,且堆块在该fastbin链表的指向如下(chunk1和chunk2的地址不用)
1 | a1[0] = b; |

分析2
- 接下来的三行代码,分别再次申请堆块,且和前面申请的堆块大小一样,堆的分配就会按照
a2 -> a1 -> b来分配即上图fastbin列表的结构
1 | a2 = malloc(sizeof(int)); |
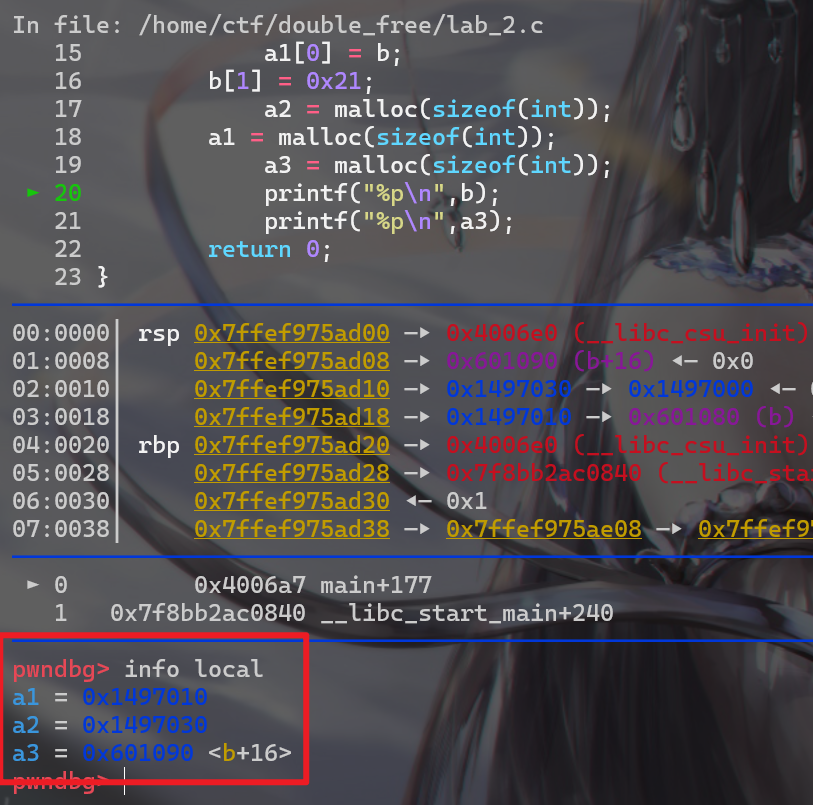
- 之后的两个输出就会出现如下的结果
1 | 0x601080 |
总结
- 通过实验1,我们可以得知,double_free时,链表的结构会发生一些微妙的变化。导致了双重释放的堆块的fd指针是可以写入的。
- 通过实验2,我们可以得知,利用double_free,可以修改某个chunk的fd指针,然后再修改伪造堆块的size为,这样使用malloc申请堆内存的时候就可以申请到任意地址,而且该内存地址能被写入内容,这就会导致一些漏洞。
double_free利用
level_1
- 题目来源:PolarD&N (polarctf.com),pwn部分,简单题
heap_double_free - 题目附件:https://wwsq.lanzoue.com/iQqo529sohpg 密码:gkpw
- 拿到附件先查看保护
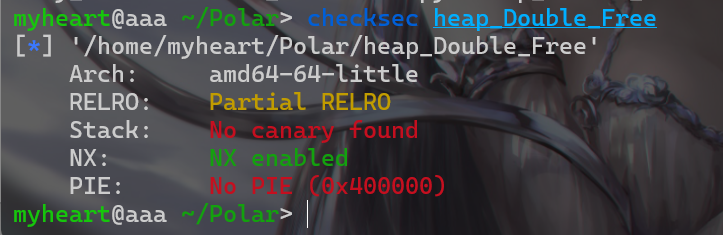
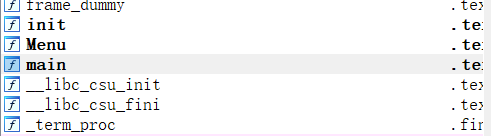
- 然后使用IDA静态分析,打开IDA后发现有1个重要函数即main函数,
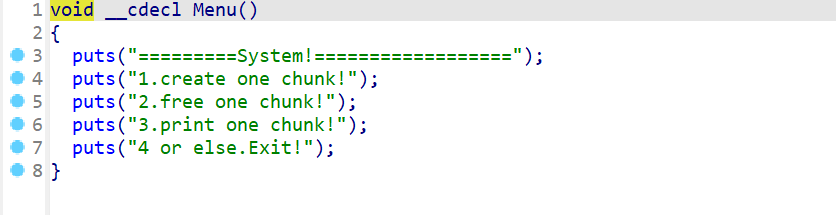
Menu函数就显示菜单
分析
- 经典的一个菜单题,先看看菜单
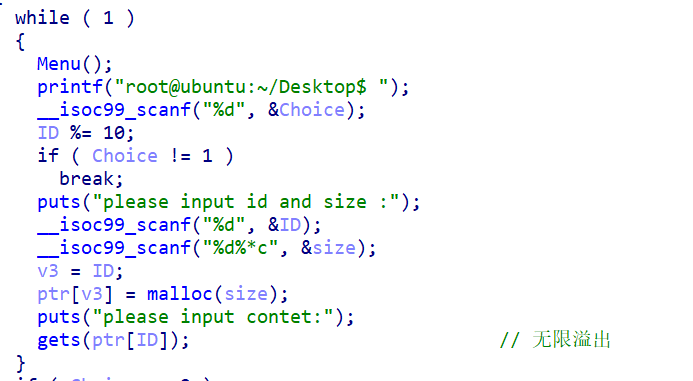
- 查看main函数,先查看1创建堆块部分,发现有一个
gets危险函数,可以无限溢出
- 再查看2、3释放和打印堆块部分,发现使用free函数后指针没有置0。可能是uaf漏洞,也可能是double_free,加上题目附件名称有
double_free那么就是doubl_free漏洞了
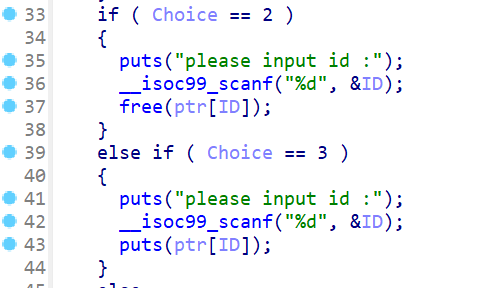
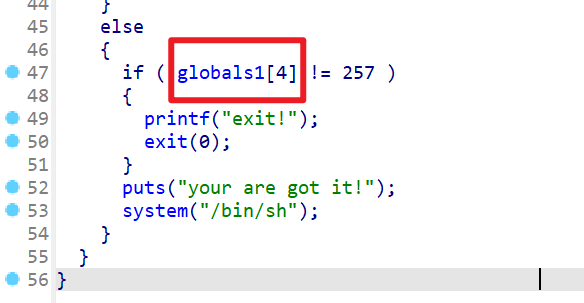
- 最后再来看剩下部分
- 发现当选择退出的时候,会检查
globals1[4]这个数组,如果他不等于257的话就会退出 - 同时发现了后面有
system("/bin/sh")函数
- 发现当选择退出的时候,会检查
- 程序直接就给了我们shell函数,这就简单多了。现在我们来查看一下
globals这个全局变量- 发现globals是int类型数组(大小为4字节),一个有10个元素
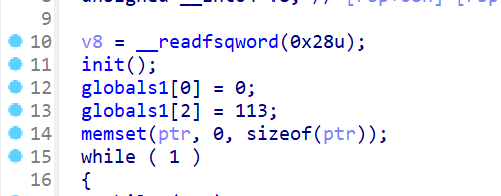
- 还发现在main函数开始
globals1[0]会被置0,globals1[2]会被置113

-
既然要利用到double_free,那么可能就是利用double_free对globals这个数组进行写入,然后再getshell
-
下面来从伪造堆块的角度来深度分析一下globals这个int类型的数组

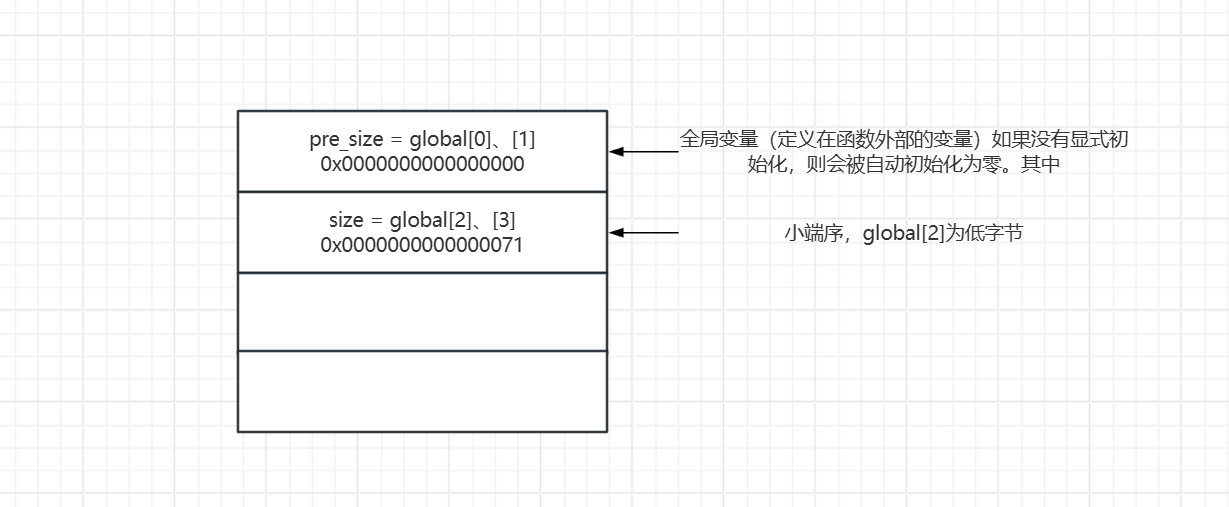
- 深入分析后可以得知我们需要double_free大小为
0x70的chunk,才能伪造堆块造成进行任意地址读写
利用
-
我们先申请两个大小为
0x68的chunk,这里为什么不是申请0x70的chunk,在前面有讲过,这里不多说 -
申请完两个堆块后chunk1,chunk2后,再利用free释放堆块,释放顺序为chunk1,chunk2,chunk1,这样就构成了,实验上fastbin链表结构
-
当然后再次申请,
0x68大小的chunk,这时在fastbin中的chunk1就会被申请,将golbals的地址变量写入到chunk1的fd指针中去。 -
再进行两次free,两次free后,fastbin就指向了global变量的起始位置,经过而golbals的size部分题目已经帮我们伪造好了
0x71,然后再申请一个0x68大小的chunk,就会申请到global变量的位置。malloc返回值恰好是globals[4]变量的地址,这时就可以对该地址写入0x101,即113 -
然后再选择退出,即可getshell
1 | from pwn import * |
 wechat